

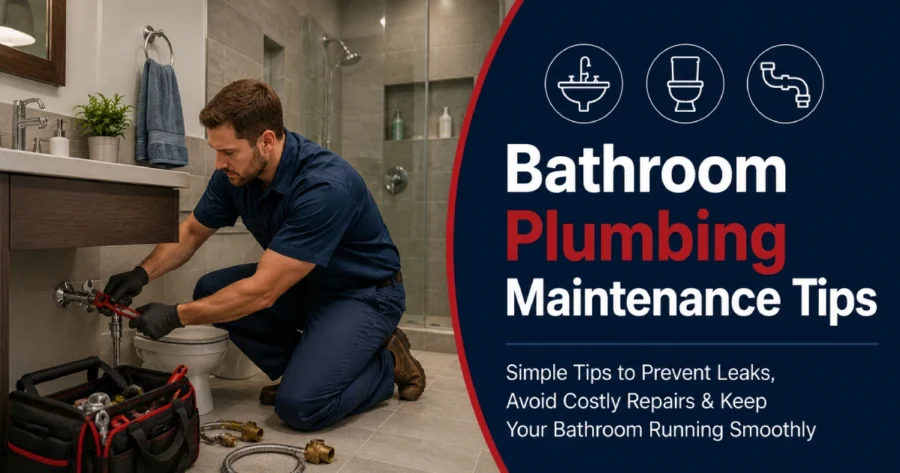
Bathroom plumbing maintenance tips help homeowners in the USA keep toilets, sinks, showers, and drains in good working condition while reducing the risk of unexpected plumbing issues. Following routine plumbing maintenance tips extends the lifespan of bathroom fixtures, helps prevent leaks, improves water efficiency, and minimises repairs.
WhatsDemand helps residents understand essential bathroom plumbing maintenance practices, identify minor issues before they become major repairs, and keep their plumbing systems operating efficiently year-round.
1. Drain and Showerhead Care
Drain and showerhead care starts with clearing hair, soap scum, and biofilm from the P-trap before they harden into a full clog. Showerheads need regular descaling, since hard-water mineral buildup clogs the flow restrictor and reduces water pressure over time.
The small blockages trap moisture and corrode pipes when left unchecked, which is why routine drain cleaning matters for keeping bathroom plumbing running and preventing repairs.
2. Toilet Maintenance
Toilet maintenance involves checking the flapper valve for warping or mineral buildup, since a poor seal can let water seep from the tank to the bowl and spike the water bill. The fill valve and float arm need periodic adjustment to keep the water level below the overflow tube, preventing the system from running continuously.
Wax ring seals at the base must be inspected, as a failed seal causes the toilet to rock and leak at the floor.
3. Supply Lines and Shut-Off Valves
Supply lines and shut-off valves control water flow to the toilet and sink, and both must be checked for corrosion, mineral buildup, or brittle rubber washers that lead to sudden failure.
The shut-off valve seizes up from disuse, making it unusable in an emergency. Testing valves every 5-7 months keeps them functional. It is worth reviewing the shut-off valve problem guide for common failures and replacement steps if notice rust stains, slow drips, or a valve that does not fully close.
4. Leak Protection and Caulking
Leak protection and caulking means resealing the joints around the tub, shower pan, and toilet base with silicone caulk, since gaps let water seep into subflooring and cause rot or mold.
Caulk naturally shrinks and cracks over time due to temperature shifts and constant moisture exposure, so it must be inspected every 6 to 12 months. Re-caulking the seams keeps water contained within fixtures and protects the structural integrity of the bathroom floor and walls.
5. Clean Sink and Faucet Aerators Regularly
Clean sink and faucet aerators regularly refers to unscrewing the mesh screen at the faucet tip to remove sediment, calcium deposits, and mineral scale that restrict water flow.
Aerators mix air into the water stream, and clogged screens cause sputtering, low pressure, or uneven flow at the tap. Soaking the aerator in a vinegar solution every 1 to 2 months dissolves buildup and maintains consistent water flow.
6. Check for Hidden Leaks
Checking for hidden leaks involves inspecting under sinks, around the toilet base, and at supply line connections for water stains, warped flooring, or a musty odor, which signal slow seepage.
A quick way to confirm a leak is to check the water meter reading before and after a 2-hour period with no water use. Any change indicates a leak somewhere in the system. Catching hidden leaks early prevents structural damage, mold growth, and higher water bills from going unnoticed for 1-3 months.
7. Test the Toilet for Silent Leaks
Test the toilet for silent leaks by adding a few drops of food coloring or a dye tablet into the tank, then waiting 10 to 15 minutes without flushing. The flapper valve is not sealing properly and is letting water leak silently into the bowl if color appears in the bowl.
The simple test catches a leak that wastes hundreds of gallons a month without any visible sign at the surface.
8. Replace Aging Flexible Water Supply Lines
Replace aging flexible water supply lines because rubber or braided hoses degrade over 5 to 10 years, becoming brittle, corroded, or prone to bulging under constant water pressure.
A burst supply line releases gallons of water per minute, causing severe flooding before the shut-off valve is even reached. Swapping older lines for braided stainless-steel supply hoses adds durability and reduces the risk of sudden rupture.
9. Exercise Shut-Off Valves Periodically
Exercise shut-off valves periodically by turning each valve fully closed and then fully open every 3-6 months to prevent internal components from seizing due to mineral deposits or rust. Valves left untouched for 3 years can become stuck, which is dangerous in an actual emergency, when the water flow is cut off immediately.
Regular operation keeps the valve stem and seals functional, ensuring reliable shut-off access whenever it is needed.
10. Prevent Drain Clogs
Prevent drain clogs by using a mesh drain strainer to catch hair and debris before they enter the pipe, as buildup narrows the pipe diameter and slows drainage over time.
Flushing the drain weekly with hot water helps break down soap scum and grease that cling to the pipe walls. Avoiding chemical drain cleaners is key, as their corrosive ingredients weaken older pipes even while clearing the clog.
11. Monitor Water Pressure
Monitor water pressure using a pressure gauge attached to an outdoor spigot or the washing machine hookup. Household pressure must stay between 40 and 80 PSI for safe operation.
Pressure above the range strains pipe joints, fixture seals, and appliance connections, increasing the risk of leaks or bursts over time. Installing a pressure-reducing valve protects the entire plumbing system from premature wear if readings run consistently high.
12. Avoid Flushing Non-Flushable Items
Avoid flushing non-flushable items like wipes, cotton swabs, dental floss, or paper towels. The items do not break down like toilet paper and snag on pipe walls or joints. It creates blockages that back up the entire drain line, not just the toilet.
Sticking to the “three P’s rule (pee, poop, and paper) keeps the plumbing system running without risk of clogging.
13. Prevent Mold and Moisture Buildup
Prevent mold and moisture buildup by running the bathroom exhaust fan in and after showers to pull humid air out before it settles on walls, ceilings, or grout lines.
Wiping down wet surfaces and keeping the shower curtain or door open to air-dry reduces the damp conditions mold needs to grow. Trapped moisture seeps into drywall and subflooring, leading to structural damage far beyond what routine ventilation can address.
14. Address Minor Plumbing Issues Early
Addressing minor plumbing issues early means fixing small drips, slow drains, or loose fittings as soon as they appear, rather than waiting for them to worsen. A minor leak at a joint or valve signals a failing seal or washer, and delaying repair lets water damage spread to surrounding materials. Handling issues promptly, whether it is a washer or a tightened connection, prevents them from becoming repairs down the line.
15. Schedule Routine Bathroom Plumbing Inspections
Schedule routine bathroom plumbing inspections at least once a year to have a professional check supply lines, shut-off valves, drain flow, and hidden connections that are not visible in daily use.
Inspections catch early corrosion, worn seals, or pressure irregularities before they escalate into leaks or bursts. Annual checkups extend the lifespan of bathroom fixtures and pipes while keeping repair predictable instead of sudden and expensive.
What Is the Importance of Bathroom Plumbing Maintenance?
The importance of bathroom plumbing maintenance is preventing small issues (worn seals, corroded valves, or loose fittings) from turning into major system failures through regular inspection and upkeep.
The proactive care prevents water damage to floors and walls, keeps water pressure and drainage running efficiently, and reduces the frequency of costly emergency repairs. It extends the lifespan of toilets, faucets, and supply lines by addressing minor issues like common plumbing problems, before they escalate into replacements.
How Can I Prevent Hair from Clogging My Bathroom Drains?
You can prevent hair from clogging your bathroom drains by installing a mesh drain strainer over the tub or sink drain, since hair combines with soap scum to form dense clogs that block pipe diameter over time. Hair is one of the common blockage culprits because it tangles around the drain stopper and pipe walls, gradually slowing water flow until the drain backs up completely.
Understanding the trap and overflow layout through a bathtub plumbing guide helps identify where hair tends to accumulate, for tub drains specifically.
Why Should I Avoid Using Chemical Drain Cleaners in My Pipes?
You should avoid using chemical drain cleaners in your pipes because their corrosive ingredients (sodium hydroxide or sulfuric acid), generate intense heat that can warp PVC pipes, corrode metal plumbing, and degrade rubber seals or gaskets over repeated use.
Older drain systems are vulnerable, because decades of wear already weaken pipe walls, and the added chemical stress cause leaks or cracks. Releasing toxic fumes when mixed with other substances and contaminating wastewater once flushed through the system.
How Often Should I Clean or Descale My Showerhead and Sink Aerators?
You should clean or descale your showerhead and sink aerators every 3 to 6 months, or once a month if live in a hard water area with high calcium and magnesium content. Mineral deposits gradually clog the small nozzle holes and mesh screens, restricting water flow and causing uneven or weakened spray patterns.
The buildup forces fixtures to work harder, reducing water pressure and shortening the lifespan of the showerhead or faucet aerator.
How Do I Know if My Toilet Tank Has a Hidden Leak?
The signs of a hidden toilet tank leak are listed below.
- Phantom Flushing: The toilet tank refills automatically at intervals without any prior use.
- Continuous Running Water: A worn flapper valve or misaligned float allows water to trickle from tank to bowl nonstop.
- Unexpectedly High Water Bills: A sudden spike in water charges reflects hidden waste despite unchanged household consumption.
- Food Coloring Test: Dye dropped into the tank and traced into the bowl within minutes confirms a faulty flapper seal.
Are “Flushable Wipes” Actually Safe for Bathroom Plumbing?
No, “Flushable Wipes” are not safe for bathroom plumbing, despite their labeling, because they does not disintegrate like toilet paper and can take 3 hours or even days to break down.
The wipes slow degradation causes them to snag on pipe joints, tree roots, or municipal sewer lines, forming blockages known as “fatbergs” when combined with grease. Sticking to toilet paper alone remains the safest option to avoid clogs and sewage backups.
What Is the Correct Water Level for A Toilet Tank?
The correct water level for a toilet tank is about 1 inch below the top of the overflow tube, marked by a fill line etched inside tanks. The level ensures the flapper valve gets enough water pressure to fully flush waste while preventing water from continuously spilling into the overflow tube.
Water set too low causes weak, incomplete flushes, while water set too high wastes water and strains the fill valve, so adjusting the float arm correctly helps prevent toilet clogs and keeps the flush cycle efficient.
How Often Should Flexible Water Supply Lines Be Replaced?
Flexible water supply lines should be replaced every 5 to 10 years, since rubber and braided hoses degrade from constant water pressure and mineral exposure. Signs like bulging, discoloration, or brittleness signal a hose nearing failure and must prompt immediate replacement instead of waiting out the full lifespan. Upgrading to braided stainless steel lines, which connect directly into the broader water supply lines feeding a home’s fixtures, offers better durability against corrosion and sudden bursts.
Why Is It Important to Turn Shut-Off Valves on And Off Periodically?
It is important to turn shut-off valves on and off periodically because inactivity allows mineral deposits and corrosion to accumulate around the valve stem, causing it to seize shut or stuck open.
Operating each valve once or twice a year keeps internal components moving freely, so it responds quickly in an actual plumbing emergency.
What Are the Signs That a Water Supply Hose Is About to Burst?
The signs that a water supply hose is about to burst are listed below.
- Bulging Sections: A swollen area with the hose indicates internal pressure has weakened the hose wall beyond its normal capacity.
- Cracks: Fine splits along the hose surface expose the inner lining to water pressure it can no longer contain.
- Rust: Reddish-brown residue near metal fittings signals corrosion eating through the connection point.
- Corrosion: A greenish or white crust on brass or copper fittings weakens the seal between hose and valve.
- Fraying: Exposed wire strands on braided hoses reduce the structural support holding the hose together.
- Kinks: A bent or twisted section restricts water flow and creates a stress point prone to sudden failure.
- Leaks Near Fittings: Moisture pooling at the connection points reveals a loosened or deteriorated seal.
- Discoloration: Faded or stained hose material reflects prolonged exposure to heat, chemicals, or aging rubber.