

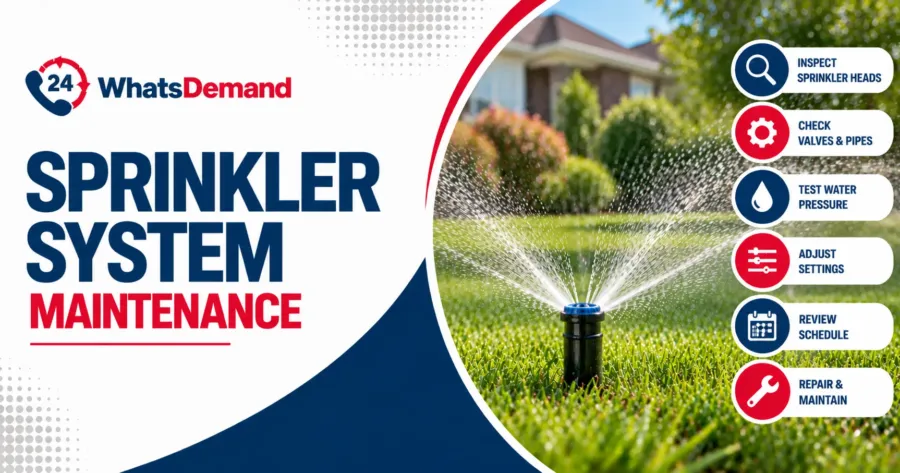
Sprinkler system maintenance is the routine inspection, testing, cleaning, adjustment, and repair of every part of an irrigation system to water your lawn efficiently and without waste. It covers regular checks on sprinkler heads, valves, pipes, and the controller, catching small problems like a clogged nozzle, a stuck valve, or a drifting schedule before they turn into a flooded lawn or a dry patch.
This guide walks through what maintenance actually involves, how often to do it, how it changes by season, the most common problems you’ll run into, and which repairs are safe to handle yourself versus when it’s time to bring in a professional plumbing services provider.
What Is Sprinkler System Maintenance?
Sprinkler system maintenance is the regular inspection, testing, cleaning, adjustment, and repair of all parts of an irrigation system. This includes all parts of the system, not just the visible components above ground: sprinkler heads, nozzles, valves, pipes, and the controller. Some of the main goals of maintenance are to ensure even water distribution across the whole lawn and avoid dry spots and oversaturation, to reduce water waste due to leaks, misaligned heads, or overwatering, to ensure reliable operation so the system runs on schedule without manual intervention, and to prolong the life of the system. Components that get routinely checked and adjusted wear out more slowly than components that get neglected until they fail.
How Does Sprinkler System Maintenance Work?
Sprinkler system maintenance works as a repeatable process: inspect the system, test it while it’s running, adjust what’s off, repair what’s broken, then retest to confirm the fix worked. Skipping the retest step is one of the most common mistakes; a repair that looks fine when the water’s off can still leak or misfire once pressure is back on.
To understand how sprinkler system maintenance works, follow the steps below.
- Inspect sprinkler heads and nozzles.
- Check valves and pipes.
- Test water pressure and coverage.
- Adjust sprinkler settings.
- Check the controller and irrigation schedule.
- Repair damaged or worn components.
- Retest the sprinkler system.
1. Inspect Sprinkler Heads and Nozzles
Inspecting sprinkler heads means walking the yard while the system runs a short test cycle and looking for heads that are cracked, sunken below grade, tilted, or clogged with dirt and grass. Even a nozzle partially blocked by debris throws off its entire spray pattern, so this step is usually where the most obvious problems show up first.
2. Check Valves and Pipes
Checking valves and pipes means confirming that each zone valve opens and closes fully and that no supply line is leaking underground. A valve that’s stuck partway open keeps a zone running low-pressure water constantly; a cracked pipe can lose water for weeks before it shows up as a soggy patch on the surface.
3. Test Water Pressure and Coverage
Testing water pressure means running each zone and confirming the spray reaches its intended distance with even coverage, no weak, dribbling heads, and no heads blasting well past the lawn’s edge. Pressure problems in a sprinkler system often trace back to the same root causes as low water pressure elsewhere in the house. A slightly closed valve, a supply-side restriction, or sediment buildup in the line.
4. Adjust Sprinkler Settings
Adjusting sprinkler settings means correcting the spray radius, arc, and direction on each head so water lands on the lawn and garden beds instead of the driveway, sidewalk, or side of the house. Most rotor and spray heads have a simple screw or dial adjustment for this, accessible without any tools beyond a screwdriver.
5. Check the Controller and Irrigation Schedule
Checking the controller means confirming the watering schedule still matches the season, the time zone and clock haven’t drifted, and each zone has the correct run time. A schedule left unchanged from summer into fall is one of the most common causes of overwatering.
6. Repair Damaged or Worn Components
Repairing damaged components means replacing cracked heads, worn nozzles, failed valves, or degraded seals rather than leaving them to keep wasting water. Most sprinkler heads and nozzles are inexpensive and designed to be swapped without digging up the whole line.
7. Retest the Sprinkler System
Retesting means running a full cycle again after every repair or adjustment to confirm the fix holds under real operating pressure, not just when the water is off. This final step closes the maintenance loop and wasn’t retested after repair.
How Often Should You Perform Sprinkler System Maintenance?
Sprinkler system maintenance is essential at least twice a year. Do it once during spring startup and again before winter shutdown, along with a brief mid-season inspection to ensure optimal performance. How often you actually need it depends on several factors. The system’s age plays a significant role; older systems with worn seals and valves require more frequent checks. Water quality is crucial, as hard or sediment-heavy water clogs nozzles and valves faster. Usage intensity also affects maintenance needs; a system running daily in summer heat wears out faster than one used a few times a week. Local climate conditions, such as freeze-thaw cycles and high mineral content in the soil, can accelerate component wear. Skipping regular maintenance often starts with an unexpectedly high water bill, followed by dead or oversaturated patches in the lawn, which leads to a system-wide failure that costs far more to fix than a routine check would have.
How Do You Maintain a Sprinkler System by Season?
Sprinkler system maintenance needs change across the year. Spring focuses on startup and testing, summer on performance checks and adjustments, fall on preparing for lower temperatures, and winter on protecting the system from freezing.
How Do You Start a Sprinkler System in Spring?
To start the sprinkler system, follow the steps below.
- Slowly open the main shut-off valve to avoid a pressure surge through the pipes.
- Run each zone individually and check for leaks at the valves and heads.
- Clear any dirt or debris out of nozzles before running a full cycle.
- Update the controller’s schedule for the new season.
How Do You Turn On a Sprinkler System After Winter?
To turn on a sprinkler system after winter, follow the steps below.
- Begin with the same startup sequence as any spring start.
- Conduct a leak check, as freezing temperatures during winter can crack pipes and fittings, even if you drain the system.
- Run the first full cycle after winter while closely monitoring every valve and head.
- Do not leave the system unattended until you confirm everything is functioning properly.
How Do You Winterize a Sprinkler System?
To winterize the sprinkler system, follow the steps below.
- Shut off the water supply to the irrigation system.
- Open drain valves or use compressed air to blow out remaining water from the lines.
- Insulate any exposed backflow preventer or above-ground piping.
- Set the controller to “off” or rain mode for winter.
The same freezing risk that threatens sprinkler lines applies to indoor plumbing; see our guide on pipework freezing prevention for winter plumbing tips that cover the rest of the house.
What Are Common Sprinkler System Problems?
The common sprinkler system problems are listed below.
- Clogged nozzles: Clogged nozzles result from dirt, grass clippings, or mineral sediment building up inside the nozzle opening.
- Sunken or tilted heads: Sunken or tilted heads result from soil settling or lawn equipment driving over the head.
- Stuck valves: Debris trapped in the valve mechanism or worn-out internal seals.
- Leaking pipes or fittings: Leaking pipes or fittings are caused by ground shifting, tree root intrusion, or freeze damage from a previous winter.
- Uneven water pressure: Uneven water pressure is caused by a partially closed valve, a supply-side restriction, or too many zones running simultaneously.
- Controller malfunctions: Controller malfunctions are caused by a dead backup battery, power surges, or a schedule that was never updated for the season.
How Long Does a Sprinkler System Last?
A sprinkler system’s overall lifespan depends on component quality, installation quality, soil conditions, water quality, local climate, and maintenance consistency. Different parts of the system wear out at varying rates. For instance, sprinkler heads and nozzles generally need replacement every 5 to 10 years, while valves can last between 10 and 15 years with regular upkeep. Controllers typically last over 10 years, although electronic components may fail sooner due to power surges. When installed correctly and protected from freezing, they can last more than 20 years. Preventive maintenance extends the lifespan of all these components by identifying minor issues like a stiff valve or a slightly clogged nozzle before they escalate into significant failures that could compromise the entire zone.
Can You Do Sprinkler System Maintenance Yourself?
Yes, most routine sprinkler system maintenance is well within reach for a homeowner. Inspecting heads, clearing clogged nozzles, adjusting spray patterns, and running seasonal startup/shutdown are all straightforward tasks that need no special tools or training. Larger repairs, such as a broken main line, a failed backflow preventer, or a controller wiring issue, are usually better left to a professional.
How Do You Lubricate Pop-Up Sprinkler Heads?
Lubricating a pop-up sprinkler head means applying a small amount of silicone-based lubricant (never petroleum-based) to the head’s riser so it moves smoothly up and down without sticking. First, remove any dirt from around the head, apply the lubricant sparingly to the riser stem, then run the zone a few times to work it in. Avoid over-lubricating, as it attracts more dirt and grit.
What Tool Can You Use to Clean Around Sprinkler Heads?
The tools you can use to clean around sprinkler heads are listed below.
- A small stiff-bristle brush for clearing dirt and grass clippings from around the head housing.
- A nozzle-cleaning tool or thin wire for clearing debris directly out of the nozzle opening.
- A hand trowel for cutting back grass or soil that’s grown over a sunken head.
- A garden edger for keeping grass from encroaching on heads along lawn borders.
How Do You Fix a Sprinkler That Won’t Oscillate?
To fix a sprinkler that won’t oscillate, follow the steps below.
- Clean the nozzle and gears. Dirt and grit inside the head are the most common cause of a stuck rotor.
- Check for physical obstructions. Grass, mulch, or soil built up around the head can physically block movement.
- Test the water pressure. Pressure that’s too low won’t generate enough force to drive the rotor mechanism.
- Inspect the internal gear or turbine. A worn or broken gear inside the head usually means the head itself needs replacing.
If cleaning and pressure checks don’t resolve it, the internal mechanism is likely worn out, and swapping the head is usually cheaper and faster than trying to fix it further. Plumbing repair services can also handle it if it’s tied into a larger irrigation or backflow issue.
Can You Use WD-40 on Sprinkler Heads?
No, you should not use WD-40 on sprinkler heads. It’s a petroleum-based product that can degrade the rubber seals and plastic components inside the head, and it attracts dirt rather than repelling it. Use a silicone-based lubricant made for outdoor or irrigation use instead.
When Should You Hire a Professional for Sprinkler Maintenance?
Call a professional plumber for sprinkler maintenance when the problem goes beyond surface-level cleaning and adjustment, such as a broken main supply line, a failing backflow preventer, electrical or wiring issues with the controller, or a system-wide pressure problem that doesn’t trace back to a single valve or head. These situations often require specialized tools, permits, or plumbing code knowledge that goes beyond routine homeowner maintenance. If you’re unsure whether an issue is a quick DIY fix or something bigger, our guide on when to call a plumber breaks down the warning signs worth watching for.