

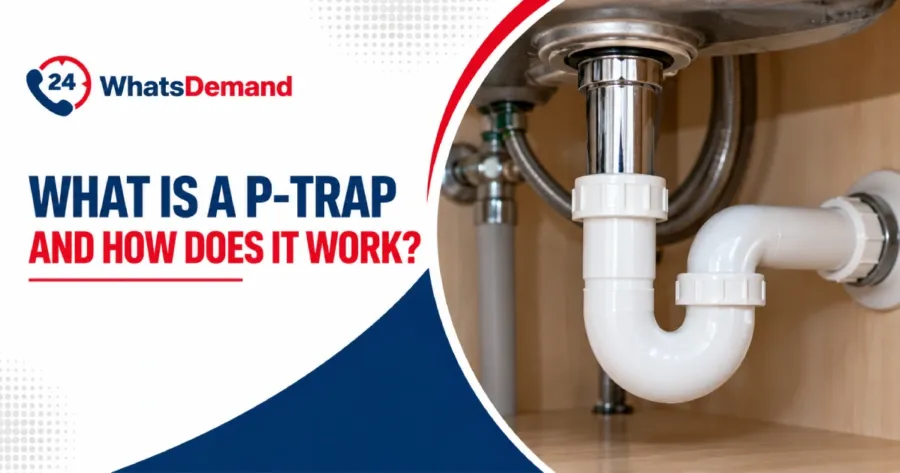
A P-trap is a curved section of drain pipe that holds a small plug of water to block sewer gas from entering a building. It sits under bathroom sinks, kitchen sinks, bathtubs, showers, and washing machine drains. Its shape looks like a sideways letter P, which gives the fitting its name.
This guide explains what a P-trap does, how it works, and what it is made of. It also covers how to install one, how to fix common problems, and when to call for professional plumbing services.
What Is a P-Trap in Plumbing?
A P-trap is a P-shaped drain fitting that keeps a water seal in its bend to block sewer gas from rising through a fixture drain. Every fixture in a plumbing system needs a trap, and the P-trap is the most common type under sinks and tubs.
What Does a P-Trap Do?
A P-trap does four jobs at every drain, listed below.
- Blocks sewer gas: The water seal keeps gas that rises from sewer water from entering the room.
- Keeps out pests: The water plug also keeps insects and small vermin from crawling up the drain.
- Catches heavy objects: Rings, small parts, and heavy debris settle in the bend instead of lodging deep in the drain line.
- Gives cleaning access: The trap comes apart at its slip joints, so you can reach clogs without removing the fixture.
How Does a P-Trap Work?
A P-trap works by holding water in its bend after every use. Each new flow pushes the old water out and leaves fresh water behind. The water seal is the standing water held in the bend that blocks sewer gas. The trap weir is the high point on the outlet side of the bend, where water spills over into the trap arm. The IPC and the UPC both set the seal depth at 2 to 4 inches, measured vertically from the weir to the dip of the trap. Both codes cover this in Chapter 10.
The process runs in five short steps.
- Wastewater leaves the fixture and drops through the tailpiece.
- The water fills the bend.
- The water level rises to the trap weir.
- The extra water spills over the weir and flows down the trap arm to the drain line.
- Fresh water replaces the old water, and the water left in the bend becomes the new seal.
What Are the Parts of a P-Trap?
A P-trap has five main parts that connect the fixture to the drain line.
- Tailpiece: The tailpiece is the vertical pipe that carries water from the fixture outlet down to the trap.
- Trap bend: The trap bend is the U-shaped curve that holds the water seal.
- Trap arm: The trap arm is the horizontal pipe that carries water from the trap to the wall drain.
- Slip nuts and washers: These parts seal each joint and let you take the trap apart by hand.
- Cleanout plug: Some traps include a plug at the low point of the bend for quick cleaning.
Where Are P-Traps Located?
P-traps sit directly below the drain of each fixture. You can see them under bathroom and kitchen sinks, and they hide behind walls or below floors for tubs, showers, and washing machines. A toilet does not use a separate P-trap because its trap is built into the porcelain. A flooded toilet therefore points to a clog in that built-in trap or in the drain beyond it. Floor drains also have their own traps.
How Is a P-Trap Different From Other Traps?
A P-trap connects to a vented wall drain, while an S-trap drops straight into the floor and can siphon its water seal away. Codes treat the two very differently, and the table below compares the common trap types.
| Trap Type | Shape and Design | Common Applications | Venting Requirement | Plumbing Code Status |
|---|---|---|---|---|
| P-trap | U-bend with a horizontal outlet | Sinks, tubs, showers, and washers with a wall drain | Vented | Standard under the IPC and UPC |
| S-trap | S-shape with a vertical outlet | Older fixtures that drain into the floor | Usually unvented | Prohibited under the IPC and UPC |
| J-bend/U-bend | Single J- or U-shaped curve | Sink and basin drains | Needs a vent | Allowed when vented |
| Bottle Trap | Compact bottle-shaped body | Basins in tight spaces | Needs a vent | Limited to special conditions under the UPC |
| Drum Trap | Round canister | Older bathtub and sink drains | Needs a vent | Prohibited under the IPC, except as a solids interceptor or on chemical waste; limited under the UPC |
| Running Trap | U-bend in a horizontal drain line | Building drains | Needs a vent | Banned in new homes under New York’s 2020 Residential Code |
Both the IPC and the UPC prohibit S-traps. An unvented S-trap tends to siphon, which pulls the water out of the seal and lets sewer gas into the room. Check your local code before you plan any work, because local wording can differ.
The terms J-bend and U-bend vary by region. In the UK, “U-bend” is the everyday word for a waste trap. In the US, the same curve forms the body of a P-trap.
What Are P-Traps Made Of?
P-traps come in several materials, and the right choice depends on the fixture.
- PVC and ABS plastic: These plastics resist corrosion and are the usual choice for sinks and tubs.
- Polypropylene: This plastic is light and handles drain chemicals well.
- Chrome-plated brass: Brass traps suit exposed sinks because the finish looks clean.
- Cast brass: This material is heavy and durable, and it lasts a long time in busy kitchens.
- Cast iron: Cast iron appears in older systems and larger drains, and it corrodes over time.
How Is a P-Trap Installed?
To install a P-trap, follow the steps below.
- Turn off the water to the fixture and place a bucket under the drain.
- Measure from the fixture tailpiece to the wall drain. Keep the drop from the fixture outlet to the trap weir within 24 inches.
- Cut the tailpiece and trap arm to length with a pipe cutter.
- Slide a slip nut and washer onto each pipe, with the beveled side of the washer facing the joint.
- Join the tailpiece to the trap bend, then join the trap bend to the trap arm.
- Set the trap arm so it slopes down toward the wall drain at about 1/4 inch per foot.
- Hand-tighten each slip nut, then add a quarter turn with pliers.
- Run water through the fixture and check each joint for leaks.
How Do You Fix Common P-Trap Problems?
Most trap problems have a clear cause, and each one points to its own fix. Many of these plumbing problems start at the fixture, so a quick check of the trap is a good first move. The most common P-trap problem is a clog.
To fix a clogged P-trap, follow the steps below.
- Place a bucket under the trap to catch water and debris.
- Loosen the slip nuts by hand, or use pliers if they are tight.
- Remove the trap bend and empty it into the bucket.
- Clear the debris with a brush and rinse the bend with water.
- Refit the trap with the washers in place, and hand-tighten the slip nuts.
- Run water and check each joint for leaks.
Call a plumber if odors return, a leak comes back after you tighten the joints, or a metal trap shows corrosion. Call a plumber too when the clog sits beyond the trap, because a trap cleaning will not reach it.
FAQs About P-Traps
The short answers below cover the questions homeowners ask most about P-traps.
Do plumbing codes require P-traps?
Yes, the IPC and the UPC require a water-seal trap on each fixture, with a few exceptions for fixtures that have a built-in trap. The P-trap is the standard way to meet that rule.
Can a P-trap be installed backwards?
No, a reversed trap drains poorly and may not hold a full water seal. The inlet side must face the fixture, and the outlet side must connect to the trap arm.
How long does it take for a P-trap to dry out?
An unused P-trap can dry out in about a month, since evaporation runs roughly 1 to 3 inches per month. Hot, dry air speeds this up.