

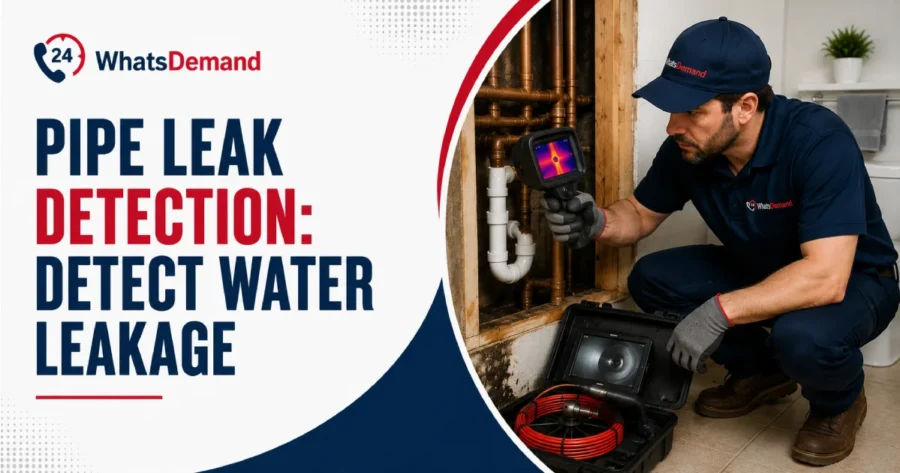
Pipe leak detection is the process of identifying visible and hidden water leaks before they cause damage. Early leak detection in the USA helps prevent water waste, damage, mold growth, and costly repairs. Supply pipe leaks occur in pressurized water lines that deliver clean water, while drain pipe leaks develop in wastewater lines.
Fixture leaks originate from faucets, toilets, and water heaters, while underground plumbing leaks occur beneath the ground or slab foundation and require plumbing services to locate and repair.
What Is Plumbing Leak Detection and Why Is It Important?
Plumbing leak detection is a diagnostic process in which plumbers use acoustic sensors, infrared thermal imaging cameras, pressure testing equipment, and video pipe inspection systems. It identifies breaches in a water supply or drain lines.
Detection is important because undetected leaks cause deterioration in foundations, load-bearing walls, and flooring, while creating conditions that accelerate mold and mildew proliferation.
Why Are Hidden Water Leaks Dangerously Costly?
Hidden water leaks are dangerously costly because concealed breaches behind drywall, subfloor assemblies, ceiling joists, and slab foundations migrate silently through building materials long before any visible sign surfaces.
Prolonged moisture infiltration weakens load-bearing walls and foundation slabs, accelerates mold and mildew colonization inside enclosed cavities, saturates insulation, and drives water bills upward while the breach worsens with every billing cycle.
What Are the Signs You Need Water Leak Detection?
The signs that indicate a need for water leak detection are listed below.
- Unexplained Water Bill Spikes: Utility statements reflect higher-than-normal consumption with no corresponding increase in household water usage.
- Damp or Wet Spots: Unexplained moisture appears on floors, walls, or ceilings with no direct connection to plumbing fixtures.
- Water Stains: Brownish or yellowish discoloration marks surfaces where water repeatedly seeps through and dries inside building materials.
- Musty Odors: Persistent mildew smell originates from active moisture accumulation inside wall cavities, subfloor assemblies, or ceiling joists.
- Peeling or Bubbling Paint: Wall and ceiling coatings separate from the substrate as trapped moisture disrupts adhesion between layers.
- Reduced Water Pressure: A drop in flow rate at fixtures signals a supply line breach diverting water before it reaches the outlet.
Where Do Water Leaks Commonly Occur?
The common locations where water leaks occur are listed below.
- Supply Lines: Pressurized pipes develop pinhole leaks, joint separations, or corrosion-induced breaches along their run.
- Drain and Waste Pipes: Non-pressurized drain lines crack at hub joints, allowing wastewater to seep into subfloor assemblies and wall cavities.
- Pipe Joints and Fittings: Threaded connections, soldered joints, and compression fittings lose their seal due to thermal expansion, corrosion, or improper installation.
- Water Heater Tanks: Tank-style units develop internal corrosion, causing base leaks, pressure relief valve failures, or inlet and outlet connection drips.
- Toilet Base and Supply Lines: Wax ring deterioration and loose braided supply lines allow water to escape at floor level.
- Faucets and Shut-Off Valves: Worn O-rings, deteriorated packing washers, and faulty valve stems cause persistent dripping at fixture connections.
- Slab Foundations: Embedded copper or galvanized lines corrode or shift due to soil movement, creating pressurized leaks beneath the structure.
How Do You Detect Leaks in Supply & Drain Pipes?
To detect leaks in supply and drain pipes, follow the seven steps listed below.
- Shut Off All Water Fixtures: Turn off every faucet, toilet, and appliance valve inside the property to eliminate active water consumption before beginning the inspection.
- Monitor the Water Meter: Check the meter dial or digital readout for movement after 30 minutes of zero fixture use, indicating an active supply line breach.
- Pressurize the Supply Lines: Use a pressure gauge on the main shutoff valve to identify pressure drops that signal a breach with the distribution network.
- Inspect Pipe Joints and Fittings: Examine threaded connections, soldered joints, and compression fittings for mineral deposits, corrosion staining, or moisture accumulation.
- Run Water Through Drain Lines: Pour water into each drain fixture and observe the drain pipe run below for dripping at hub joints or pipe collars.
- Check Subfloor and Wall Cavities: Use a moisture meter along baseboards and wall surfaces near drain runs to detect moisture readings inside assemblies.
- Flush and Inspect Drain Flow: Observe drain speed at each fixture for drainage indicating partial blockages or fractures. A condition best addressed through drain cleaning services before the obstruction worsens.
How Do Professional Plumbers Detect Water Leaks?
Professional plumbers detect water leaks through a diagnostic process that begins with reviewing symptoms (reduced water pressure, audible pipe sounds, and abnormal utility consumption) before inspecting exposed plumbing components.
Findings from the initial assessment determine which detection method is deployed, whether acoustic sensors, infrared thermal imaging, or video pipe inspection cameras are used, each targeting a specific pipe system and leak type.
How Does Acoustic Leak Detection Work?
Acoustic leak detection works by using ground microphones and electronic sensors to pick up the sound that pressurized water makes when it escapes through a cracked or damaged pipe. It produces a vibration between 40 Hz and 4,000 Hz that travels through surrounding soil when water forces its way out of a breach, concrete, and pipe walls.
Plumbers follow that sound signal to know the exact leak location underground or behind walls without digging or breaking open surfaces.
How Are Thermal Imaging Cameras Used for Leak Detection?
Thermal imaging cameras are used for leak detection by capturing infrared radiation from surfaces, revealing unusual temperature where moisture evaporation causes wet building materials to cool faster than dry surrounding areas.
The cold spot patterns on the thermal display allow experts to map suspected moisture zones behind walls, under floors, and above ceilings without cutting into surfaces. Plumbers assess pipe condition and apply epoxy pipe coating to seal deteriorated pipe interiors.
What Is Pressure Testing and How Is It Done?
Pressure testing isolates a plumbing system and introduces pressurized air or water to identify breaches through pressure drops.
To perform pressure testing, follow the six steps listed below.
- Shut Off the Main Water Supply: Close the main shutoff valve to isolate the plumbing system from the municipal supply line.
- Seal All Fixture Outlets: Cap or plug every faucet, drain outlet, and fixture connection to create a fully closed system.
- Connect the Pressure Gauge: Attach a calibrated pressure gauge to the test port or hose bib to monitor system pressure readings.
- Introduce Pressurized Air or Water: Pump air or water into the isolated system to the manufacturer-specified test pressure using a hand pump or compressor.
- Monitor Pressure Readings: Observe the gauge over a set hold period. A pressure drop confirms an active breach in the system.
- Locate and Mark the Breach Point: Trace the pressure loss along pipe runs using soapy water on joints and fittings to pinpoint the exact leak location.
How Do Plumbers Use Cameras for Sewer Line Inspection?
Plumbers use cameras for sewer line inspection by inserting a fiber-optic video camera into the sewer line through an access point, transmitting live footage to an above-ground monitor for real-time pipe interior assessment. The camera feed reveals common pipe problems including root intrusion, joint separations, pipe corrosion, grease buildup, and collapsed sections. Identified defects are addressed through sewer line repair services before the deterioration compromises the entire drain system.
How Can You Find & Detect Plumbing Leaks Yourself?
You can find and detect plumbing leaks yourself by monitoring the water meter during zero fixture use, inspecting exposed pipe joints for moisture, and watching utility bills for unexplained spikes.
DIY methods are limited to accessible plumbing components, meaning concealed slab leaks, pressurized supply line breaches, and drain line fractures behind walls cannot be located without acoustic sensors and thermal imaging equipment. Making emergency plumbing services the required next step for hidden leaks.
How Do You Check Your Water Meter for Hidden Leaks?
To check the water meter for hidden leaks, follow the five steps listed below.
- Shut Off All Water Fixtures: Turn off every faucet, toilet, appliance valve, and irrigation line to ensure zero active water consumption inside the property.
- Locate and Read the Water Meter: Find the water meter at the property curb or utility box and record the current dial or digital readout value.
- Wait Without Using Any Water: Leave all fixtures off for 30 to 60 minutes to allow the meter to reflect any water movement in the system.
- Re-Read the Meter Dial: Return to the meter and compare the new reading against the previously recorded value for any measurable change.
- Identify Active Leak Indicators: Confirm a hidden leak if the meter dial has advanced or the leak indicator needle has moved despite zero fixture use in the test period.
How Do You Inspect Walls and Ceilings for Water Damage?
Inspect walls and ceilings for water damage by pressing drywall surfaces for soft or spongy areas, checking for brownish or yellowish staining that shows dried moisture deposits, and scanning paint surfaces for bubbling or peeling caused by trapped water beneath the finish layer.
Musty odors near enclosed wall cavities and ceilings signal active mold colonization from an ongoing leak above or behind the surface. A moisture meter pressed against suspect areas confirms water content inside the base before any surface damage becomes fully visible.
When Should You Hire Professional Leak Detection Services?
You should hire professional leak detection services when an active leak produces no visible source with exposed pipe runs, when recurring wet spots reappear after repeated DIY attempts, or when cracks, soggy yard sections, and odors point to underground or concealed breaches.
Hidden slab leaks and supply line failures behind finished walls all fall outside the scope of visual inspection and require plumbers equipped with acoustic sensors, thermal imaging cameras, and video pipe inspection tools.
How Do Plumbers Fix Pipe Leaks Once Located?
Pipe leak repairs depend on pipe type, location, and breach severity, ranging from localized patches to full pipe section replacement. To fix pipe leaks once located, follow the six steps listed below.
- Assess Pipe Material and Breach Severity: Examine the damaged section to determine pipe material and select the appropriate repair method.
- Isolate the Damaged Pipe Section: Shut off the nearest supply valve to stop water flow before accessing the affected pipe run.
- Apply Pipe Clamps or Repair Couplings: Secure a stainless steel clamp or slip coupling over pinhole leaks and minor joint separations.
- Cut and Replace Deteriorated Pipe Sections: Remove corroded or fractured segments and install new pipe using soldered, press-fit, or push-to-connect fittings.
- Apply Epoxy Pipe Lining for Interior Breaches: Coat deteriorated pipe interiors with structural epoxy to seal corrosion-induced leaks without full replacement.
- Pressure Test the Repaired Section: Restore water supply and monitor the repaired section for pressure retention and zero moisture output.
How Can You Prevent Plumbing Leaks in the Future?
The effective ways to prevent plumbing leaks in the future are listed below.
- Pipe Insulation: Foam wrap on supply lines in unheated crawl spaces prevents freeze-thaw cracking in cold seasons.
- Water Pressure Regulation: A pressure-reducing valve on the supply line keeps system pressure within the safe 40-80 PSI range.
- Joint and Fitting Inspection: Annual checks on threaded connections and soldered joints catch early corrosion before a breach develops.
- Drain Maintenance: Regular hydro-jetting clears grease deposits and root intrusion that stress pipe walls and accelerate joint separation.
- Water Softener Installation: A whole-house water softener reduces mineral scale buildup inside copper and galvanized supply lines, extending pipe service life.
What Maintenance Habits Help Prevent Future Leaks?
The maintenance habits that help prevent future leaks are listed below.
- Annual Pipe Inspection: A plumber checks exposed supply and drain lines for corrosion, joint separation, and pinhole deterioration.
- Fixture Connection Checks: Braided supply lines, compression fittings, and shutoff valves beneath sinks and behind toilets are inspected and tightened annually.
- Water Heater Maintenance: Sediment flushing and anode rod checks prevent corrosion that causes tank base leaks.
- Shutoff Valve Exercising: Turning every isolation valve prevents mineral seizure that causes failure in emergency shutoffs.
- Appliance Hose Inspection: Washing machine and dishwasher hoses are replaced every five years before rubber degradation causes failures.
- Water Meter Monitoring: Monthly meter readings in zero fixture use detect unexplained consumption spikes from concealed leaks.
- Drain Cleaning Schedule: Quarterly drain flushing removes grease and debris that stress pipe walls and hub joints.
Are Smart Leak Detectors and Automatic Shutoff Valves Worth It?
Yes, smart leak detectors and automatic shutoff valves are worth installing because Wi-Fi-enabled sensors at high-risk zones (water heater bases and under-sink supply lines) trigger instant alerts the moment moisture is detected.
Automatic shutoff valves cut water supply to the entire property upon breach detection. Valve mechanisms are still prone to problems with shutoff valves like mineral seizure and actuator failures that affect long-term reliability.