

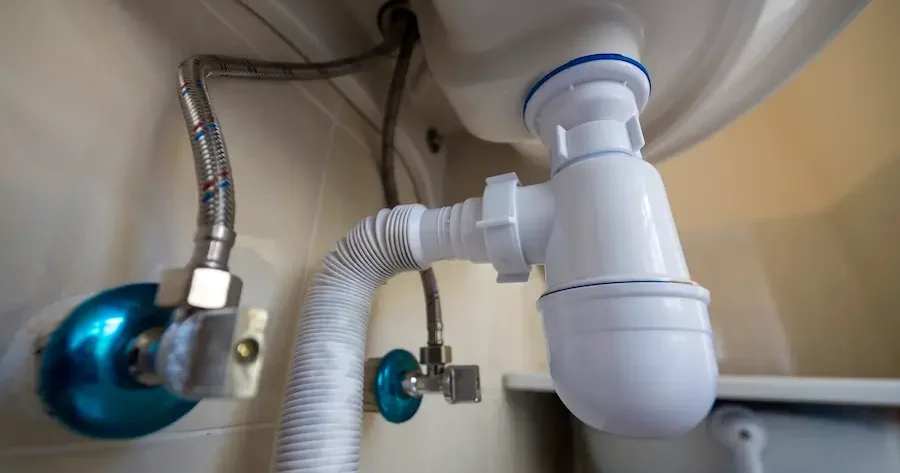
The plumbing installation process is a guide that shows the 13 phases required to determine a safe water supply in homes and buildings. The plumbing installations is important because proper execution prevents leaks, avoids violations, and ensures approval before occupancy. The installation of plumbing system varies by location, while climate zones affect insulation needs and freeze protection.
Regional building codes, soil conditions, water quality, and regulations create requirements that impact design, material selection, testing procedures, and the timeline for completing the plumbing system.
1. Underground and Rough-In Plumbing
Underground and rough-in plumbing establishes the pipe network before walls, floors, and finishes are completed. The process starts by laying drainage, waste, vent, and water supply pipes according to the home’s plumbing plan. Plumbers connect and position pipes for future fixtures while maintaining proper slopes and clearances.
This step matters because most plumbing becomes difficult or expensive to access after construction. Plumbers also check pipe locations, connections, and drainage slopes before the foundation, walls, and other structures cover them. Particular areas include the building sewer, underground drains, water supply lines, bathroom plumbing, kitchen plumbing, laundry connections, and vent piping.
2. Top-Out and Pipe Assembly
Top-out plumbing connects and extends the rough-in pipework through the home’s walls, ceilings, and upper floors. Plumbers assemble water supply, drain, waste, and vent pipes and route them to their planned fixture locations. Pipe supports, fittings, and connections are installed as the plumbing system takes shape.
This step is important because it creates the complete internal pathway for water to reach fixtures and wastewater to leave the home. Proper pipe assembly also helps prevent leaks, flow problems, and installation conflicts with electrical or structural components. Particular areas include wall cavities, ceiling spaces, upper floors, bathrooms, kitchens, laundry areas, vent stacks, and fixture supply and drain connections.
3. Main Fixture and Water Heater Installation
Main fixture and water heater installation involves placing the plumbing fixtures and equipment that will use or supply water throughout the home. Plumbers install the water heater, connect hot and cold water lines, and prepare fixtures such as toilets, sinks, showers, bathtubs, and kitchen plumbing.
This step is important because the plumbing system must connect correctly to each fixture and appliance before final testing and operation. Proper installation also helps maintain reliable water flow, drainage, temperature control, and safe water heater operation. Particular areas include water heaters, toilets, bathroom sinks, showers, bathtubs, kitchen sinks, laundry connections, and other water-using appliances.
4. Pressure Testing and Code Compliance Inspection
Pressure testing and code compliance inspection verify that the newly installed plumbing system is safe, functional, and built according to applicable requirements. Plumbers test water supply and, where required, drainage or other piping systems for leaks, pressure loss, or installation problems. Inspectors then review accessible plumbing work against local building and plumbing codes.
This step is important because defects can be corrected before walls, ceilings, and finishes hide the pipework. Passing the required inspection also confirms that the installation meets applicable safety, installation, and construction requirements. Particular areas include water supply pipes, drainage and waste piping, vent systems, pipe connections, shutoff valves, fixture locations, water heater connections, and required clearances.
5. Final Trim-Out and System Commissioning
Final trim-out and system commissioning complete the plumbing installation and prepare it for everyday use. Plumbers install the visible fixture components, connect faucets and drains, attach toilets and other fixtures, and complete final water and drainage connections. The system is then operated to check water flow, drainage, temperature, pressure, and leaks.
6. Installing Drain, Waste, and Vent (DWV) Pipes
Installing Drain, Waste, and Vent (DWV) pipes is running 3-inch toilet drains and 1.5-inch fixture branches at a 1/4-inch per foot slope with vent stacks extending through the roof. Installing the pipes prevents sewer gas entry by maintaining P-trap water seals.
Installation covers main waste stack placement, horizontal branch routing, stack sizing to prevent drainage problems, sewer connections, and roof terminal locations for proper drainage.
This step is important because it confirms the entire plumbing system works as intended. Any remaining leaks, drainage problems, fixture issues, or connection defects can be identified and corrected before the home is occupied. Particular areas include faucets, sinks, toilets, showers, bathtubs, appliance connections, water heaters, drains, shutoff valves, and accessible plumbing connections.
What Does a Plumbing Installation Include?
A plumbing installation includes the water supply system, drain-waste-vent (DWV) network, and fixture connections required for potable water delivery and wastewater removal. Core components include 3/4-inch main supply lines, PEX branches, 3-inch main drain stacks sloped at 1/4-inch per foot, roof vent stacks, shut-off valves at main and fixtures, and P-trap assemblies.
Plumbing standard operating procedures mandate 50 PSI hydrostatic testing on supply lines and code compliance verification before wall closure. Optional components (water heaters with relief valves and expansion tanks) complete a full plumbing for house system.
What Is the Difference Between Plumbing Installation and Plumbing Repair?
Plumbing installation is the setup of water pipes, drain pipes, fixtures, and valves in new homes or buildings, while plumbing repair is a fix for broken pipes, leaks, clogs, and broken fixtures in existing homes. A new plumbing system installation includes laying main water lines, and drain pipes with proper slope and connecting all fixtures over 2-4 weeks with design and testing, while repair focuses on fixing one problem (leaks, clogged drains, or damage) in 1-2 hours to 1 day.
New homes and major renovations need complete system setup, but when pipes break, fixtures fail, or water leaks happen in existing homes, plumbing repair is what residents need.
What Types of Pipes Are Used in Modern Plumbing Installations?
The types of pipes used in modern plumbing installations are listed below.
- PEX Tubing. Flexible cross-linked polyethylene resists freezing and installs faster than pipe with fittings, remaining functional for over five decades in residential applications.
- Copper Piping. Metal tubing is permanently soldered, resists corrosion and bacterial growth, and endures 70 years or longer in commercial spaces.
- PVC Piping. Plastic drainage material assembled with cement joints handles cold water and maintains integrity for 50 years as the standard for drain-waste-vent systems.
- CPVC Piping. Chlorinated polyvinyl chloride tolerates hot and cold water supply temperatures and performs through 50 years of service in residential systems as a budget-friendly alternative.
- Cast Iron Piping. Heavy ferrous metal absorbs water flow noise and withstands underground pressure but deteriorates after 40–50 years in older sewers.
- ABS Piping. Acrylonitrile Butadiene Styrene (ABS) plastic resists freezing in cold climates, glues with solvent cement, and operates for 40 years with temperature swings.
What Types of Pipes Are Used in Plumbing Installations?
The types of pipes that are used in plumbing installations are listed below.
- PEX Tubing. Flexible cross-linked polyethylene resists freezing and installs faster than pipes with fittings, remaining functional for over five decades in residential applications.
- Copper Piping. Metal tubing solders permanently, resists corrosion and bacterial growth, and endures 70 years or longer in commercial space.
- PVC Piping. Plastic drainage material assembled with cement joints, handles cold water, and maintains integrity for 50 years as the standard for drain-waste-vent systems.
- CPVC Piping. Chlorinated polyvinyl chloride tolerates hot and cold water supply temperatures and performs through 50 years of service in residential systems as a budget-friendly alternative.
- Cast Iron Piping. Heavy ferrous metal absorbs water flow noise and withstands underground pressure, but deteriorates after 40–50 years in older sewers.
- ABS Piping. Acrylonitrile Butadiene Styrene (ABS) plastic resists freezing in cold climates, glues with solvent cement, and operates for 40 years with temperature swings.
What Plumbing Codes Apply to New Installations?
Plumbing codes that apply to new installations are minimum standards protecting public health, preventing contamination, and ensuring safe water delivery and waste removal. The International Plumbing Code (IPC) provides standards, while Georgia requires copper or PEX materials, Illinois mandates trap-to-vent distances not exceeding 6 feet, New York applies backflow prevention on supply lines, and Washington State requires 50 PSI pressure testing under RCW 19.27.
Venting standards demand vent stacks extend through the roof with a 6-inch minimum diameter, drainage slopes maintain 1/4-inch per foot, supply lines operate between 20 and 80 PSI, and new plumbing system installation requires 50 PSI hydrostatic pressure testing and code inspection before occupancy.
When Should You Hire a Professional Plumber for Installation?
You should hire a professional plumber for installation when handling new system buildouts, water heater connections, main supply lines, or drain stack work. Major renovations and multi-fixture layouts require licensed plumbers because DIY mistakes cause water damage and code violations.
Expert plumber work ensures proper 50 PSI pressure testing and inspector approval, while DIY installations risk rejection. Professionals guarantee quality through correct pipe sizing, proper slope, and trap-to-vent distances that prevent future failures. Experts provide 1-2-year warranties on labor and materials, but DIY work has zero coverage. The roof vent penetrations and backflow preventers demand expertise that homeowners lack.
Can You Install Plumbing System Pipework Yourself?
Yes, you can install plumbing yourself for simple repairs (replacing fixtures, angle stops, or fixture strainers), but jurisdictions prohibit DIY work on main supply lines, drain stacks, and venting without a licensed plumber.
New installations require permits and code inspector approval that homeowners do not obtain independently, making expert installation required for legal compliance and insurance coverage.
What Are the Common Plumbing Installation Mistakes to Avoid?
The common plumbing installation mistakes to avoid are listed below.
- Improper Pipe Sizing. Installing undersized 1/2-inch main lines instead of 3/4-inch mains causes pressure drops exceeding 1.7–3.4 PSI per 100 feet, reducing water flow.
- Poor Pipe Support. Hanging pipes without clamps or brackets every 4–6 feet causes sagging, stress on joints, and leaks that damage walls.
- Inadequate Venting. Missing or undersized vent stacks allow sewer gases to enter homes and cause water seals to break, causing slow drains throughout the system.
- Incorrect Pipe Slope. Laying drain lines flat or sloped backwards instead of 1/4-inch per foot prevents waste flow, traps solids, and creates clogs requiring frequent cleaning.
- Loose Connections. Cross-threading compression fittings allows leaks at fixture stops and supply line joints that escape detection until wall damage occurs.
- Code Violations. Installing non-approved materials (aluminum piping) and exceeding trap-to-vent distances beyond 6 feet causes inspector rejection and insurance denial on claim settlements.
How Can You Maintain a Newly Installed Plumbing System?
You can maintain a newly installed plumbing system by regularly inspecting pipes for leaks, monitoring water pressure between 20 and 80 PSI, cleaning drains monthly with strainers, and checking fixtures for drips.
Check shut-off valves annually, flush hot water heater drain yearly, insulate exposed pipes before winter, and test backflow preventers every 12 months. Hire a licensed plumber every 2-3 years for a full system inspection, pressure testing, and trap seal verification to catch problems early and maximize system lifespan.
What Are the Common Plumbing Installation Mistakes?
The common plumbing installation mistakes are listed below.
- Improper Pipe Sizing. Installing undersized 1/2-inch main lines instead of 3/4-inch mains causes pressure drops exceeding 1.7–3.4 PSI per 100 feet, reducing water flow.
- Poor Pipe Support. Hanging pipes without clamps or brackets every 4–6 feet causes sagging, stress on joints, and leaks that damage walls.
- Inadequate Venting. Missing or undersized vent stacks allow sewer gases to enter homes and trap water seals to break, causing slow drains throughout the system.
- Incorrect Pipe Slope. Laying drain lines flat or sloped backwards instead of 1/4-inch per foot prevents waste flow, traps solids, and creates clogs requiring frequent cleaning.
- Loose Connections. Cross-threading compression fittings allows leaks at fixture stops and supply line joints that escape detection until wall damage occurs.
- Code Violations. Installing non-approved materials (aluminum piping) and exceeding trap-to-vent distances beyond 6 feet causes inspector rejection and insurance denial on claim settlements.
Does Proper Plumbing Installation Increase a Home’s Value?
Yes, proper plumbing installation significantly enhances a home’s value by addressing drainage problems, which are critical to a functional plumbing system. Inspectors certify code compliance, and successful testing assures buyers that the system is reliable. This attention to detail attracts buyers willing to pay 5-10% more.
Homes with new plumbing systems, including effective drainage solutions, test certificates, and permit approvals, sell faster and command higher prices than properties with aging pipes, leaks, or unresolved drainage issues.
What Are Plumbing Tips for New Homeowners?
The plumbing tips for new homeowners are listed below.
- Locate and familiarize yourself with the main shut-off valves to quickly address emergencies.
- Monitor water pressure regularly, aiming for a range between 20 and 80 PSI to ensure optimal performance.
- Inspect pipes for leaks periodically to prevent water damage and costly repairs.
- Clean drain strainers on a regular basis to avoid clogs and maintain proper drainage.
- Keep thorough documentation of all permits and pressure test certificates for future reference.
- Schedule annual plumbing inspections to catch potential issues early.
- Test backflow prevention devices yearly to ensure they are functioning correctly.
- Insulate exposed pipes before winter to prevent freezing and bursting.
- Maintain caulking around fixtures and windows to prevent water infiltration and damage.
Can You Install Plumbing Yourself?
Yes, you can install plumbing yourself for simple repairs (replacing fixtures, angle stops, or fixture strainers), but jurisdictions prohibit DIY work on main supply lines, drain stacks, and venting without a licensed plumber.
New installations require permits and code inspector approval that homeowners do not obtain independently, making expert installation required for legal compliance and insurance coverage.
Does Plumbing Installation Require a Permit?
Yes, plumbing installation requires a permit before work begins in all jurisdictions through state portals to ensure code compliance and protect homeowner insurance.
Permits verify that water supply connections and drain systems meet building codes, and skipping permits results in fines and insurance denial on water damage claims.
Do New Plumbing Installations Need to Be Inspected?
Yes, new plumbing installations need to be inspected by municipal code officials to verify compliance with pipe sizing, slope, pressure testing, trap distances, and material standards before occupancy approval.
Does Every Plumbing System Need Vent Pipes?
Yes, every plumbing system needs vent Pipes to release sewer gases and prevent drainage blockages. The plumbing vent stacks extend through the roof to maintain P-trap water seals that prevent backups and foul odors in homes.
Can Poor Plumbing Installation Cause Future Leaks?
Yes, poor plumbing installation causes future leaks when joints are loose, pipes lack support clamps, or connections are cross-threaded in assembly. Skipping pressure testing and code inspection leaves hidden defects that demand fix leaks within months, causing expensive water damage.
Does Proper Plumbing Installation Increase a Home’s Value?
Yes, proper plumbing installation increases a home’s value because inspectors certify code compliance, testing passes, and workmanship attracts buyers willing to pay 5-10% more.
Homes with new plumbing systems, test certificates, and permit approvals sell faster and command higher prices than properties with aging pipes, leaks, or code violations.
What Are Plumbing Tips for New Homeowners?
New homeowners must locate main shut-off valves, monitor water pressure between 20 and 80 PSI monthly, inspect pipes for leaks, clean drain strainers regularly, and document all permits and pressure test certificates.
Schedule annual inspections, test backflow yearly, insulate exposed pipes before winter, and maintain caulking to prevent water infiltration.