

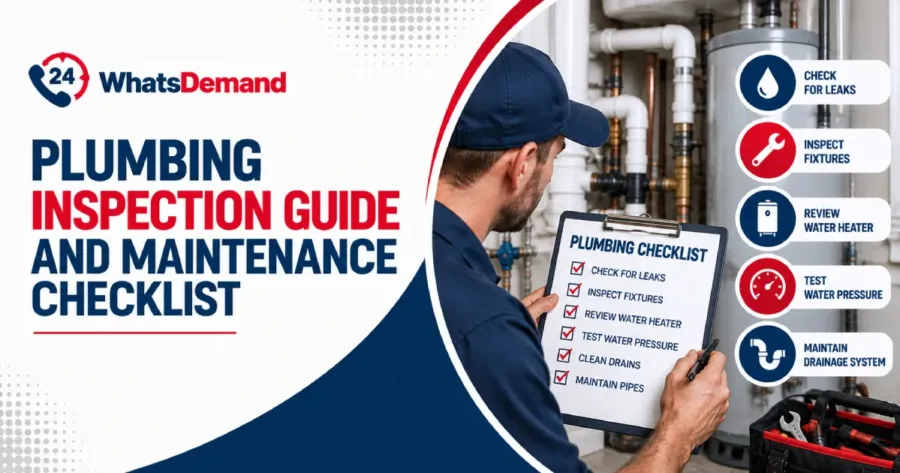
A plumbing inspection is an evaluation of a building’s water supply, drainage, and fixture systems to find leaks, wear, and code violations. This guide and its plumbing inspection checklist walk U.S. homeowners and property managers through the standards, stages, and documents involved. It explains what inspectors check under the International Plumbing Code (IPC). Leaks, corrosion, and code violations get caught before they turn into repairs.
The guide covers rough versus final inspections, residential and commercial checklist items, and inspection report sections. Readers leave with a reference for maintaining plumbing systems year-round. It suits a single-family home or a multi-tenant commercial property.
What Is a Plumbing Inspection?
A plumbing inspection is a code-compliance evaluation of a building’s water supply, Drain-Waste-Vent (DWV), and fixture systems, performed by a licensed inspector under the local Authority Having Jurisdiction (AHJ) using standards from the International Plumbing Code (IPC) or Uniform Plumbing Code (UPC).
The purpose is to confirm proper pipe materials, slope, venting, and pressure integrity through air or water tests, catching leaks and code violations before rework becomes required. Types include the rough-in inspection, which checks concealed piping before drywall goes up, and the final inspection, which verifies installed fixtures, water heater connections, and full system operation once construction nears completion.
Why Is a Plumbing Inspection Important for Residential and Commercial Properties?
A plumbing inspection is important for residential and commercial properties because it catches pipe corrosion, loose joints, and slab leaks early, preventing water damage before it spreads into walls. Inspectors check gas line connections, backflow prevention devices, and water heater pressure relief valves for safety, while flagging outdated fixtures that waste water and inflate utility bills, saving owners money over time.
Records from an inspection get logged with the local building department, similar to permit and violation databases (LADBS Property Records in Los Angeles), and the process differs in scope and code requirements between residential vs commercial plumbing systems.
When Should You Schedule a Plumbing Inspection?
You should schedule a plumbing inspection when a property changes ownership. Real estate contracts require an inspector to assess pipe condition before closing. Homes with galvanized steel or polybutylene piping installed before the 1980s warrant inspection once they approach the 40-to-50-year mark.
Warning signs (a sudden spike in the water bill, discolored tap water, or slow drains) signal an immediate need for inspection rather than waiting for a scheduled visit. Seasonal timing matters too, with a pre-winter check recommended in colder climates to catch exposed pipes vulnerable to freezing before temperatures drop.
What Is Checked During a Plumbing Inspection?
The items checked during a plumbing inspection are listed below.
- Water Supply Lines. Inspectors verify copper, PEX, or CPVC piping holds static pressure without drops that signal hidden pinhole leaks.
- Drainage System. The inspector runs water through DWV piping and checks slope, trap seals, and vent stacks for proper waste flow and sewer gas containment.
- Fixtures. Sinks, showers, and bathtubs get checked for secure mounting, functional drain stoppers, and gap-free caulking at the base.
- Toilets. The inspector checks the wax ring seal, flush valve function, and tank fill mechanism for wobble, running water, or base leakage.
- Water Heater. Technicians examine the Temperature-Pressure Relief (TPR) valve, anode rod condition, and sediment buildup inside the tank.
- Shut-Off Valves. The main water valve and fixture stops get tested for full closure and smooth handle rotation without seizing.
- Water Pressure. A pressure gauge attached to an outdoor spigot confirms readings fall within the 40-to-80 PSI range set by plumbing codes.
- Leaks. Inspectors trace moisture stains, mineral deposits, and active drips at joints, valves, and under-sink connections using visual and moisture-meter checks.
- Corrosion. Exposed metal piping gets examined for pitting, discoloration, and thinning walls that indicate galvanic reaction or age-related deterioration.
What Does a Residential Plumbing Inspection Checklist Include?
A residential plumbing inspection checklist includes the following items.
- Locate the main water shutoff valve and test it for full closure.
- Check supply line piping under sinks and behind walls for age, brittleness, and material type.
- Inspect the water heater tank for anode rod wear, TPR valve discharge, and sediment buildup.
- Test toilet wax rings, flapper valves, and fill valves for leaks and running water.
- Examine sink and tub P-traps for slow drainage and gasket wear.
- Inspect washing machine supply hoses and the standpipe drain for cracking or bulging.
- Test the sump pump float switch and discharge line for proper cycling.
- Check exterior hose bibs for frost-free function and drip leaks.
- Run a camera scope through the sewer line to check for root intrusion or cracked sections.
- Measure water pressure at an outdoor spigot to confirm the 40–80 PSI range.
What Does a Commercial Plumbing Inspection Checklist Cover?
A commercial plumbing inspection checklist covers backflow prevention devices, grease interceptors, ADA-compliant fixture heights, and multi-zone water pressure. Commercial inspections require annual backflow preventer testing under IPC Section 312.10.2, following ASSE standards, plus quarterly grease trap servicing tied to accumulation depth.
Additional areas of commercial properties include sump pumps, ejector pumps, and stormwater systems, with Legionella-risk controls at storage water heaters. Larger tank volumes and multi-story pressure zones raise contamination and scald hazards absent in homes.
Plumbing Inspection Checklist Template
A downloadable plumbing inspection checklist template is provided below, allowing owners and inspectors to record findings for water supply lines. Users fill in each item on-site and save or print the completed checklist for the records.
Home Plumbing Inspection
Kitchen
Bathroom
Septic and sewer
Other plumbing components
How Does a Plumbing Inspection Checklist Help Identify Plumbing Issues?
A plumbing inspection checklist helps identify plumbing issues through a fixed sequence of items that stops inspectors from skipping fixtures, valves, or pressure readings in a walkthrough.
The standardized format turns findings into dated records in multiple site visits, so a slow drain flagged in March gets tracked against the same line item in a follow-up inspection rather than described each time. The documentation trail gives property owners a reference point for spotting recurring patterns tied to common plumbing problems (corrosion or pressure drops) before they escalate into repairs.
What Does a Plumbing Inspection Report Include?
A residential plumbing inspection checklist includes the following items.
- Property details. The address, inspection date, and the inspector’s name and license number.
- System ratings. Water supply, DWV, fixtures, and the water heater are each rated satisfactory, minor issue, major issue, or immediate attention.
- Photos. Images with short notes show corrosion, leaks, or damaged connections.
- Recommendations. Findings are grouped into repair actions and listed by urgency.
- Signature. The inspector signs to validate the report for client records or property transactions.
What Is a Plumbing Inspection Form Used For?
A plumbing inspection form is used to record the inspector’s observations item by item during the walkthrough. It replaces memory and loose notes with a written record.
The form follows a fixed order: water supply, drainage, fixtures, and water heater. This way, no section is skipped. The inspector marks each line as satisfactory, needs repair, or urgent. Notes and photos are attached to the flagged items.
What Happens During a Rough Plumbing Inspection?
The inspector examines exposed DWV piping, water supply lines, and vent stacks installed inside walls, floors, and ceilings before drywall or insulation conceals them during a rough plumbing inspection. The inspection occurs after the plumber completes pipe installation but before any covering material goes up, because the International Plumbing Code prohibits concealing plumbing until the AHJ approves it.
The focus centers on verifying pipe slope, trap arm lengths, support spacing, and pressure test results. DWV systems typically hold 5 PSI air or 10 feet of water column head, while supply lines get tested at working pressure for a 15-minute hold.
What Is Required for a Final Plumbing Inspection?
The requirements for final inspection are listed below.
- An approved rough inspection on record.
- Fixtures installed and working: toilets, sinks, tubs, and showers drain freely.
- Water heater connected, with the TPR valve and its discharge pipe in place.
- Backflow devices installed where required.
- No leaks at any connection under normal use.
What Is the Difference Between a Rough Inspection and a Final Inspection?
The difference between a rough inspection and a final inspection is shown in the table below.
| Aspect | Rough Inspection | Final Inspection |
|---|---|---|
| Timing | Rough InspectionOccurs after pipe installation, before drywall or insulation covers the work | Final InspectionOccurs after fixtures are installed and finishes are complete |
| Scope | Rough InspectionCovers concealed DWV piping, water supply lines, and vent stacks | Final InspectionCovers installed fixtures, water heater, and full system operation |
| Testing Method | Rough InspectionDWV tested at 5 PSI air or 10 feet water column. Supply lines pressure-tested | Final InspectionFixtures tested under actual use, checking flow, drainage, and leaks at connections |
| Key Focus | Rough InspectionPipe slope, trap arm length, support spacing, and material compliance | Final InspectionFixture function, TPR valve discharge, faucet flow, and drain performance |
| Governing Restriction | Rough InspectionNo wall, floor, or ceiling covering permitted until approved (IPC Section 107) | Final InspectionCertificate of occupancy or permit closeout withheld until passed |
| Outcome | Rough InspectionClears the project to proceed to insulation and drywall | Final InspectionClears the property for occupancy or property transfer |
What Are the Common Plumbing Problems Found During an Inspection?
The common plumbing problems found during an inspection are listed below.
- Slab Leaks. Underground water lines beneath the foundation crack under soil shifts or pressure, causing hidden moisture and elevated water bills.
- Slow Drains. Grease, hair, or debris accumulation inside branch lines traps waste and reduces flow speed at sinks, tubs, and floor drains.
- Running Toilets. A worn flapper valve or misaligned fill valve allows continuous tank-to-bowl water flow, wasting gallons per hour.
- Sewer Gas Odor. A dry P-trap in an infrequently used fixture breaks the water seal, letting sewer gas escape into occupied spaces.
- Cross-Connection Hazards. A missing or failed backflow preventer creates a direct pathway for contaminated water to enter the potable supply.
- Improper Pipe Slope. Drain lines installed below the code-required ¼-inch-per-foot grade cause standing water and recurring clog formation.
- Water Hammer. Trapped air or a missing arrestor causes a banging noise in the pipes when a valve or fixture shuts off abruptly.
- Frozen Pipe Damage. Exposed supply lines in unheated areas split or crack after ice expansion during sustained freezing temperatures.
- Tree Root Intrusion. Roots penetrate cracked sewer laterals through joints, creating blockages and eventual pipe collapse underground.
- S-Trap Installation. An outdated, code-noncompliant trap configuration siphons water out of the seal, allowing sewer gas to enter the fixture area.
How Can a Plumbing Maintenance Checklist Help Prevent Repairs?
A plumbing maintenance checklist helps prevent repairs by scheduling the work before a failure shows. Water heater flushing, anode rod checks, and P-trap priming are set at regular intervals.
Routine checks catch early warning signs, such as a rising water bill or a weeping TPR valve. These signs often appear weeks before a burst pipe or tank rupture. A dated service history also shows patterns in one line or fixture across visits. Owners can then replace aging parts on their own schedule. This keeps plumbing repairs small and planned.
How Do You Prepare Your Home for a Plumbing Inspection?
To prepare your home for a plumbing inspection, follow the seven steps listed below.
- Clear Access to Fixtures. Remove stored items from under sinks, around the water heater, and near shut-off valves so the inspector can reach every component without obstruction.
- Locate the Main Shut-Off Valve. Confirm the exact location of the main water valve and test its handle rotation to verify smooth closure before the inspector arrives.
- Gather Permit and Service Records. Collect prior plumbing permits, repair invoices, and warranty documents to hand to the inspector for cross-referencing against the property history.
- Check for Visible Leaks. Wipe down pipe joints, valves, and fixture bases, then run water to spot fresh drips before the scheduled walkthrough.
- Test All Drains. Run water through every sink, tub, and floor drain to confirm normal flow speed and flag any slow-draining fixtures in advance.
- Flush the Toilets. Cycle each toilet through a full flush to check the tank refill speed and listen for continuous running water at the base.
- Ensure Exterior Access. Trim vegetation around outdoor hose bibs, cleanouts, and the water meter box so the inspector completes exterior checks unimpeded.
What Are the Benefits of Regular Residential Plumbing Inspections?
The benefits of regular residential plumbing inspections are listed below.
- Early Leak Detection. Homeowners catch pinhole leaks and slab cracks before hidden moisture spreads into subflooring or drywall.
- Extended Fixture Lifespan. Routine anode rod checks and sediment flushing at the water heater delay tank corrosion and premature replacement.
- Lower Water Bills. Identifying running toilets and dripping faucets early stops the gallons-per-minute waste that inflates monthly utility costs.
- Reduced Emergency Repairs. Scheduled inspections flag deteriorating pipe joints and worn valves before they fail into a sudden burst or flood.
- Improved Water Quality. Regular corrosion checks on galvanized piping prevent rust and mineral contamination from entering the household water supply.
- Higher Property Value. Documented inspection records demonstrate consistent maintenance, giving buyers and appraisers confidence in the plumbing system’s condition.